In this walkthrough I’ll take you step-by-step through a live gold trade I took on Monday and show how the tradingview indicator called theSignaler helped me spot, enter, and manage the trade. If you want to test the indicator yourself, get started here: https://prml.ink/WebTheSignaler. This write-up mirrors my trading voice—practical, direct, and focused on real setups. Disclaimer: this is not financial advice; it’s for educational purposes only.
What theSignaler shows and why it stands out
TheSignaler combines macro swing structure with microstructure signals. On your chart you’ll see a larger swing label called Boss Plus and smaller dashed microstructure levels beneath it. Use these two layers to read the flow of the market: when Boss Plus is bearish you bias sells; when it’s bullish you bias buys. This layered visibility is what makes this tradingview indicator so powerful for quick decision-making.
Live gold trade: setup, entry, and targets
Session and bias
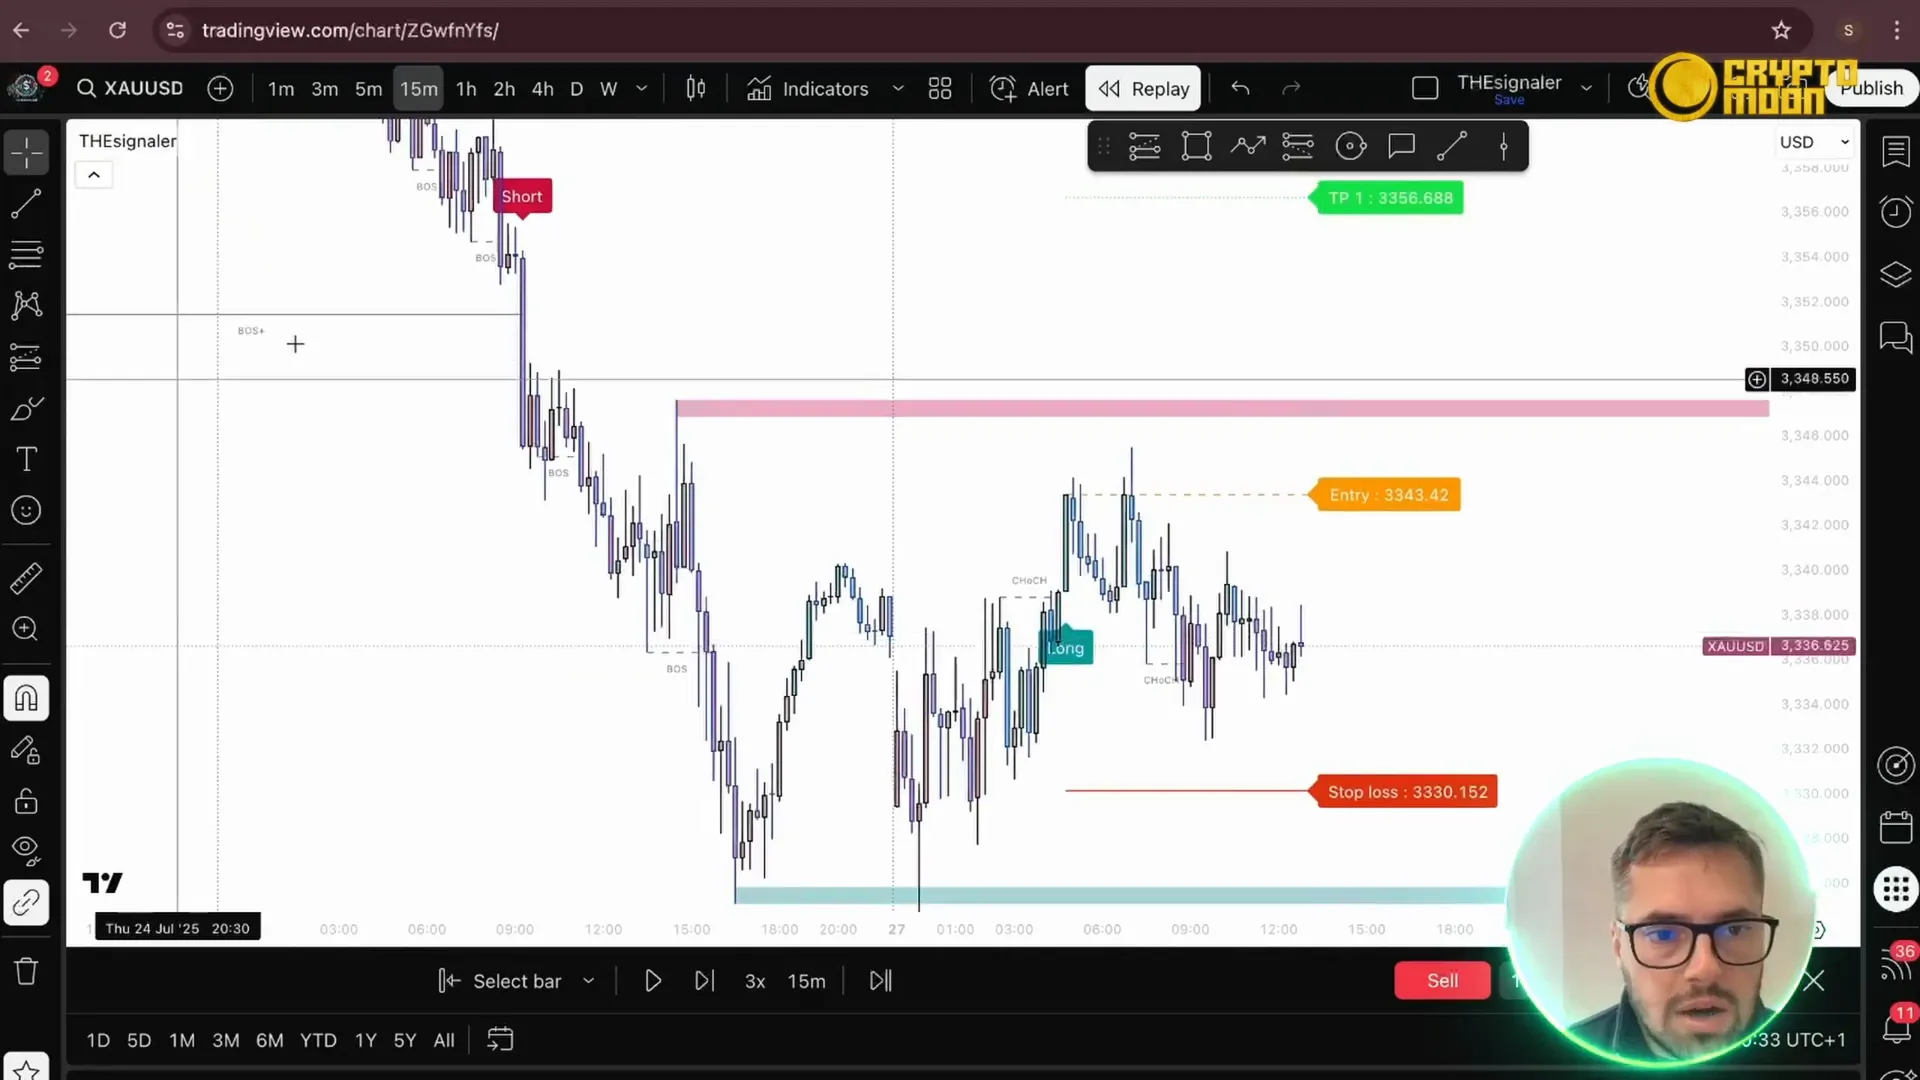
This trade was taken during the New York session. With the Boss Plus indicating a bearish swing, I ignored longs and looked for a sell. The indicator gave a clear change of character (a "chop" / CHoCH), which then produced a boss and eventually the entry signal.
Stops and take profits
Stops from the indicator are calculated using Average True Range (ATR) by default. If you prefer, you can set your stop behind a structural level for a tighter R:R, but the ATR stop gives a standardized, volatility-adjusted placement.
Take profit levels are shown as TP1, TP2, TP3 and correspond to 1:1, 2:1, and 3:1 reward-to-risk targets. For this trade I aimed for TP2 (2:1) because the bearish momentum was strong but TP3 was too far relative to the leg length and the end-of-day conditions.

Trade management
- Entry: on indicator signal once the boss and microstructure aligned with the bearish Boss Plus.
- Stop: ATR-based level provided by the indicator (option to place behind structural point).
- Take Profit: I took TP2 (2:1). TP1 is useful for a rolling stop-to-breakeven approach, but I personally prefer either TP1 or TP2 without moving stops mid-leg.
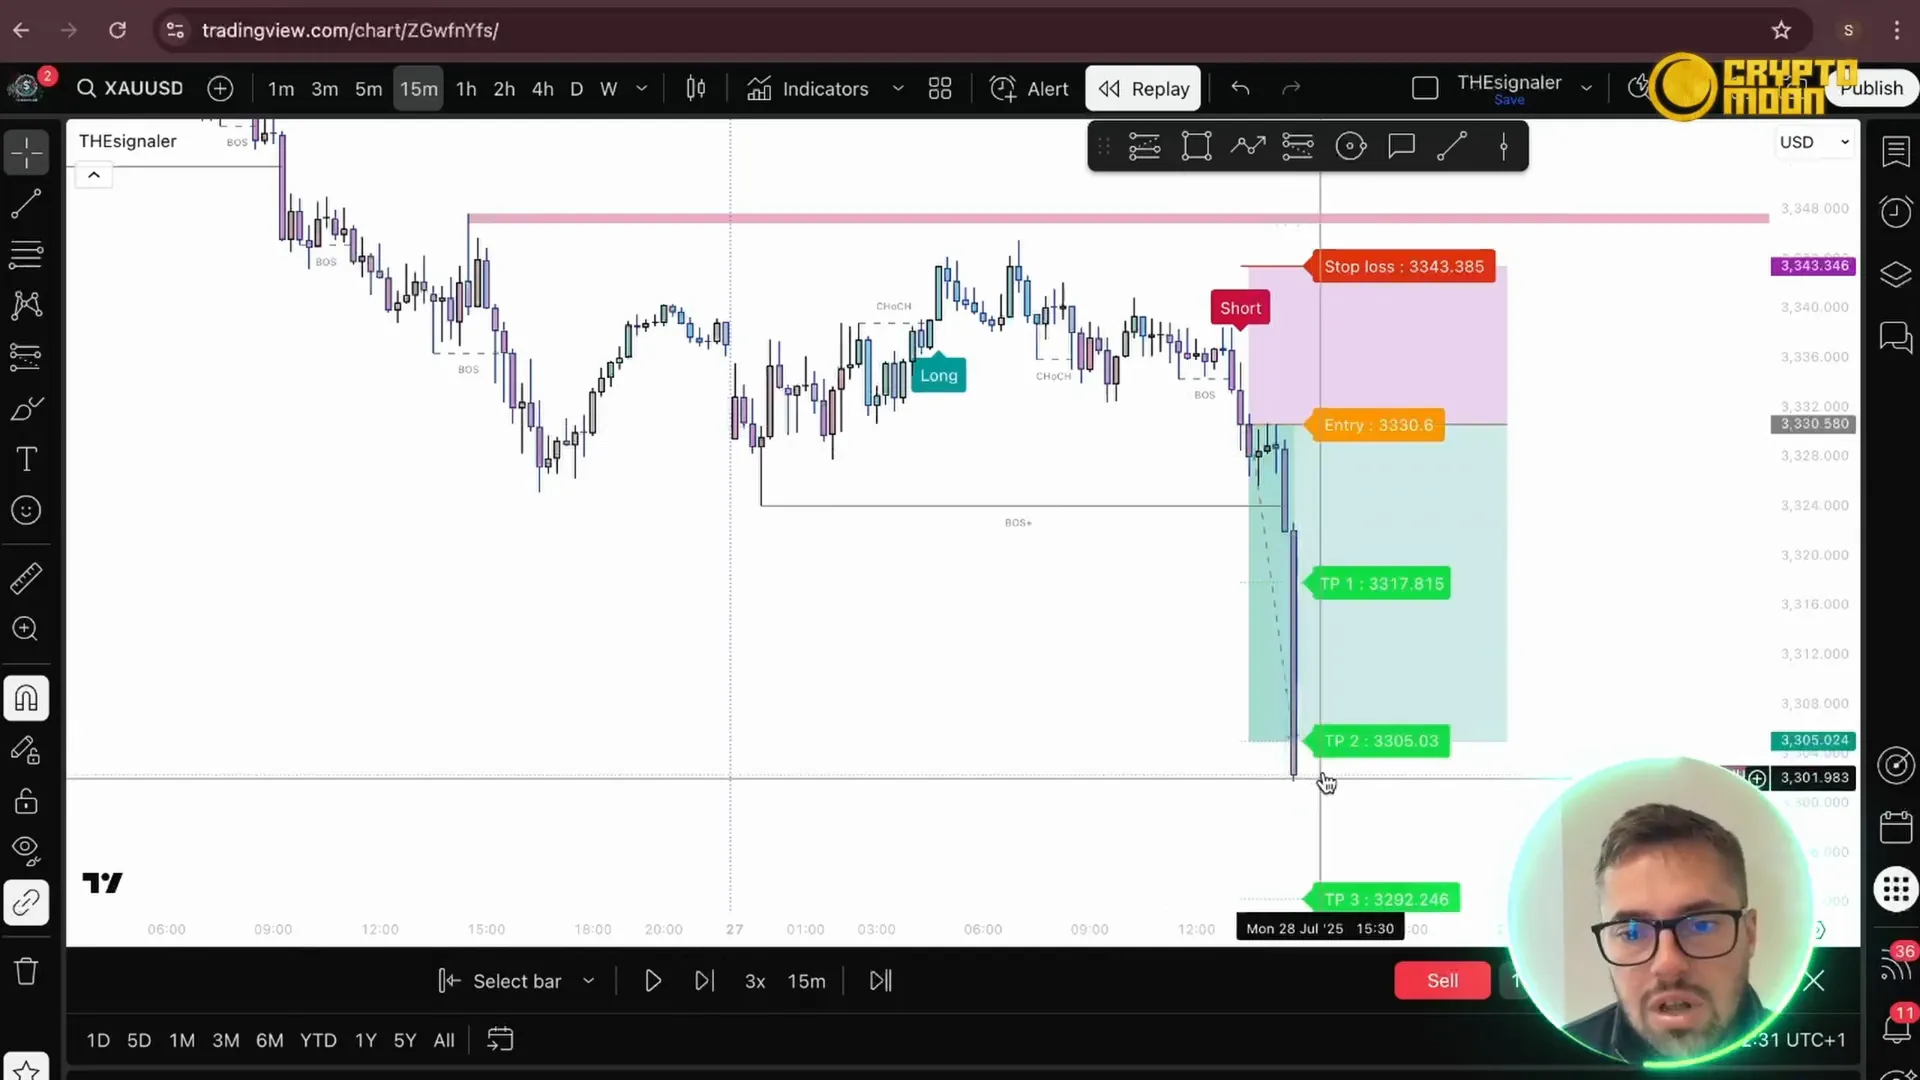
Why I didn’t chase TP3
TP3 was too far relative to the leg’s wavelength. The leg required for TP3 was roughly double the distance of the current move, and price began to map and consolidate toward the end of the day. Given that, locking TP2 made more sense and produced a quick, clean win. This kind of pragmatic target selection is what keeps your edge intact over time.
Trial, pricing, and why I recommend it
Right now there’s a seven day free trial so you can put the indicator on your chart and test the settings yourself: https://prml.ink/TheSignaler-Bot. The lifetime license is currently priced at $597 (down from $1,300 in the past). If you take the signals, most users recover that cost quickly because the indicator consolidates SMC/ICT concepts into a single, actionable tool. It’s one of the best tradingview indicator implementations I’ve used.
"I started with the 7-day trial and my first week showed consistent winners. TheSignaler simplified my decision-making and saved me hours of chart work." — Verified user testimonial
Quick checklist to use theSignaler on your charts
- Load the indicator and set your preferred ATR multiplier for stops.
- Confirm Boss Plus direction for bias (sell on bearish, buy on bullish).
- Watch for CHoCH → boss → entry sequence for high-probability setups.
- Set TP1/TP2/TP3 based on your risk appetite; default 1:1, 2:1, 3:1 is provided.
- Consider structural stops behind key levels if you want tighter risk control.
Final thoughts
TheSignaler makes structured trading practical on TradingView by combining macro and microstructure cues, ATR stops, and clear TP levels—all packed into one tradingview indicator. Try the trial to see how it fits your workflow: https://prml.ink/TheSignaler. If you prefer a simple, reliable way to read market flow and take measured trades, this tool is worth a look.
As always, trade responsibly. If you liked this walkthrough, follow my channel for more practical setups and indicator reviews.
Grab the indicator and test it: https://prml.ink/TheSignaler
The Signaler! 🌍✨ |
|
🌍✨ Click the link below for in-depth analysis on trends, technology, and more! 🔗📢 |
| Click Here |


